How to Install a Smart Doorbell Step by Step Guide for Buyers

Time:2026-04-29 Author:Henry
0%

The rise of smart home technology highlights the importance of security solutions like smart doorbells. According to a recent report by the Consumer Technology Association, smart doorbell sales surged by 30% in the past year. These devices enhance safety and provide convenience for homeowners. Knowing how to install a smart doorbell step by step can empower buyers to make informed decisions.

Installing a smart doorbell may seem straightforward, but challenges often arise. Many users underestimate the need for compatibility checks with their home systems. It’s essential to ensure that your existing doorbell wiring, Wi-Fi coverage, and smartphone compatibility all align with the new device. The right installation can greatly improve performance and user satisfaction.

Data shows that nearly 25% of consumers face issues during installation. Missteps can lead to malfunctioning devices or poor connectivity. This guide aims to provide clear, actionable steps to avoid common pitfalls and enhance your installation experience. With the right knowledge, you can effectively bolster your home’s security and enjoy the benefits of smart technology.

How to Install a Smart Doorbell Step by Step Guide for Buyers

Choosing the Right Smart Doorbell for Your Needs

Choosing the right smart doorbell is crucial. Consider your specific needs before making a purchase. Different doorbells offer varied features like video quality, two-way audio, and motion detection. Assess what’s most important to you. For instance, high-definition video may be essential for clarity, especially in dim lighting.

Think about installation requirements as well. Some doorbells require a wired connection. Others run on battery power, offering more flexibility. Reflect on your home’s setup. Will you be comfortable with more complicated wiring, or do you prefer a simple, battery-operated alternative?

Another key aspect is smart integration. Many doorbells interact with other smart home devices. Ensure compatibility with what you already own. A doorbell that works smoothly with your home network can enhance security. However, consider your Wi-Fi strength. You may find weak signals affect performance. Choosing the right smart doorbell involves thoughtful consideration of your lifestyle and needs.

Essential Tools and Materials for Installation

When installing a smart doorbell, having the right tools and materials is crucial. You'll need a few essential items to ensure a smooth installation process. First, gather a screwdriver set. This will help you handle different screws. A drill can be handy too, especially for making holes in your wall. If you're not comfortable with drilling, you may face issues later.

Next, make sure you have wire connectors. These little tools are essential for securely connecting wires. They prevent any loose connections, which could lead to malfunction. A voltage tester is also necessary to ensure safety. Without one, you might be working with live wires. Wear safety gloves while handling electrical components, just to be safe.

Lastly, have a measuring tape on hand. Precise placement is vital for the doorbell's functionality. Incorrect positioning can limit its effectiveness. Also, check your doorbell height to ensure it's user-friendly. With these tools ready, you can tackle the installation confidently. Just remember to take your time and double-check your work. Mistakes can happen, and that's okay. Learning as you go is part of the experience.

Step-by-Step Installation Process for a Smart Doorbell

Installing a smart doorbell can enhance your home security significantly. According to industry statistics, nearly 30% of all burglaries occur through the front door. A smart doorbell not only detects visitors but also provides remote access and video monitoring. However, many homeowners find the installation process challenging.

To start, ensure you have the right tools. Most installations require a screwdriver and a drill. It's essential to follow the provided instructions closely. Misalignment can lead to poor performance. A recent survey indicated that 25% of users encountered issues due to improper installation. This highlights the need for careful attention to detail.

During installation, connect the smart doorbell to your existing doorbell wiring, if applicable. If your current doorbell system is not compatible, consider a battery-operated option. Testing the unit before fully securing it can save time later. Many users overlook this step and regret it later. Finally, after installation, ensure your doorbell's software is updated for optimal performance. Regular updates are critical for maintaining security features.

Smart Doorbell Installation Steps Comparison

This chart represents the estimated time taken (in minutes) for each step of the smart doorbell installation process. Proper preparation and wire connection take the most time, while app setup and final testing are relatively quick.

Connecting Your Smart Doorbell to Wi-Fi and Smart Home Devices

Connecting your smart doorbell to Wi-Fi and smart home devices can feel overwhelming. However, breaking it down step by step makes it manageable. Start by ensuring your Wi-Fi network is stable. In many cases, placing the doorbell within a good range from the router helps. This minimizes connection issues.

Next, download the companion app for your smart doorbell. These apps usually guide you through the setup process. Follow the prompts to connect your doorbell to your Wi-Fi network. You’ll need to enter your Wi-Fi password carefully, as typos can lead to frustrating errors. If the connection fails, check for any signal interference from walls or furniture.

Once connected, integrate your doorbell with other smart home devices. Most systems support voice assistants and home automation hubs. Linking the doorbell directly to these devices enhances security and convenience. Take time to customize settings for alerts and notifications. This may require a few adjustments as your needs change. Don't hesitate to revisit the app to tweak these preferences based on your usage. Configure the features according to your lifestyle, ensuring everything works to your satisfaction.

Testing and Troubleshooting Your Smart Doorbell Setup

When setting up your smart doorbell, testing and troubleshooting is essential. You might face connectivity issues during or after installation. Ensure your Wi-Fi signal is strong where the doorbell is located. If the doorbell frequently disconnects, consider relocating the router or using a Wi-Fi extender. Sometimes, simply rebooting the doorbell can resolve minor glitches.

It's also important to check the device's app for updates. Outdated software can cause performance issues. Pay attention to notifications in the app. If the doorbell doesn’t respond to commands, try removing and re-adding it to your network. This process can often fix unresponsive features.

Pay close attention to the power supply. Insufficient power can lead to intermittent functioning. If your doorbell has a battery, ensure it is charged. If it's wired, check connections for any loose wires. Testing the physical components can uncover issues that aren't immediately visible. Remember, troubleshooting can be an ongoing process, and each attempt helps you understand your device better.

FAQS

: What tools do I need for installing a smart doorbell?

: You need a screwdriver set, a drill, wire connectors, and a measuring tape.

Why is a voltage tester necessary during installation?

It ensures safety by checking for live wires. This prevents potential electrical hazards.

How can I ensure proper placement of the doorbell?

Use a measuring tape to check height and position for effective functionality.

What should I do if the doorbell frequently disconnects?

Check your Wi-Fi signal strength. Consider moving the router or using a Wi-Fi extender.

How can I fix minor glitches in the smart doorbell?

Simply reboot the doorbell. This often resolves temporary issues.

What if the doorbell app shows outdated software?

Update the app to improve performance and fix potential issues.

How do I handle unresponsive features of the doorbell?

Remove the device from your network and then re-add it. This might restore functionality.

Why is it important to check the power supply?

Insufficient power can lead to intermittent functioning. Ensure battery or wired connections are secure.

Can mistakes happen during installation?

Yes, mistakes are part of the learning process. Take your time to minimize them.

How can troubleshooting be an ongoing process?

Each test helps you learn more about your device and its quirks over time.

Conclusion

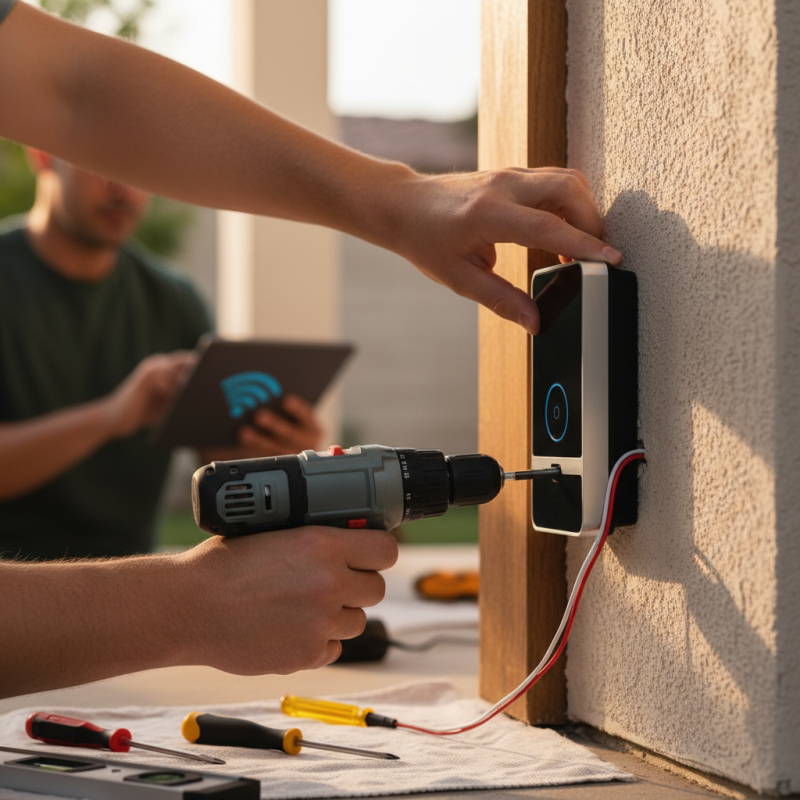
This guide provides comprehensive instructions on how to install a smart doorbell step by step, ensuring a seamless integration into your home. It begins with choosing the right smart doorbell based on your specific needs, taking into account features and compatibility with existing systems. Essential tools and materials for installation are also outlined, preparing you for a successful setup.

The step-by-step installation process is clearly detailed, covering everything from mounting the doorbell to connecting it to your home Wi-Fi and other smart devices. Finally, the guide emphasizes the importance of testing your new setup and troubleshooting any issues that may arise, providing a complete solution for enhancing your home security and convenience with a smart doorbell.

Henry

Henry

Henry is a dedicated marketing professional with a profound expertise in the company's offerings. With years of experience in the industry, he possesses an impressive understanding of the market dynamics and consumer behaviors that drive success. Henry is committed to sharing his insights through......